
Forget crunches and planks. These standing core exercises can effectively work your entire core without gettin’ down on the floor.
We get it: You don’t always want to do crunches or planks or have to get on the gym floor (ew) to work your abs. Luckily, you don’t have to. If you’ve never thought about working your core while standing, you should.
It may even be more effective because your core muscles aren’t just the ones you see in the mirror. They wrap all the way around your body, from your “six-pack” abs to your obliques (which hug the sides of your trunk) to the muscles that stabilize and support your spine.
So what are the best standing core exercises that you can do standing up? Keep reading to find out.
1. Standing march with twist
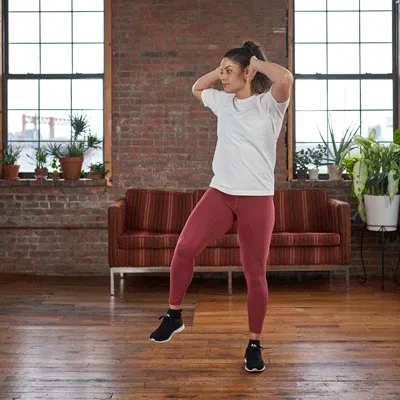
How to do it: Think of this move as slow high knees with an added twist. Stand with your feet hip-width apart, arms behind your head, and abs engaged.
Bring your right elbow to your left knee as you twist through your waist, then return to the starting position and repeat on the opposite side.
Continue to alternate sides for 1 minute.
Pro tip: Focus on using your core, not your quads, to lift your knee. Squeeze your obliques throughout.
2. Wide second side crunch
How to do it: Stand with your feet wider than hip-width apart and hold a dumbbell in each hand. Turn your toes outward and lower into a wide squat (also called a wide second squat if you’re a barre lover).
Raise your arms into a goalpost position (elbows bent to 90 degrees), engage your core, and bend to the right, aiming to tap your elbow to your thigh.
Do 10 reps to the right and 10 to the left. Alternate sides for 20 reps.
Pro tip: Make sure to squeeze your glutes and keep your hips in line with your torso. And avoid sticking your butt out.
3. Standing stabilization
How to do it: Stand with your feet hip-width apart, hold a medicine ball or dumbbell with both hands, and extend your arms in front of your chest.
Keeping your arms straight and shoulders pressed down, rotate your upper body to the right and then return to the center.
Do 10 reps to the right and 10 to the left. Alternate sides for 10 reps.
Pro tip: Don’t let your shoulders climb up to your ears. That means your upper traps are taking over.
4. Woodchop
How to do it: Stand with your feet slightly wider than hip-width apart and hold a dumbbell or medicine ball with both hands at chest height. Lower the weight to the outside of your right foot, allowing your knees to bend slightly and your feet to pivot.
Bring the weight back up across your torso and overhead to the left in a reverse chopping motion. Your feet should pivot in the same direction as the weight.
Do 10 reps, then switch sides.
Pro tip: Make sure you’re consciously engaging your core. Increase your speed to create more of a challenge.
5. Standing side bend with dumbbells
How to do it: Stand with your feet hip-width apart. Hold a dumbbell or kettlebell you can safely manage in one hand. Put your free arm on your waist. Bend from your waist toward the side you’re holding the weights on. Engage your core to pull your torso back upright.
Do the right side only for 1 minute, then the left side only for 1 minute. Then alternate sides for 1 minute.
Pro tip: Make sure you’re not sticking your butt out as you bend.
6. Standing side bend with dumbbells overhead
How to do it: Stand with your feet hip-width apart. Hold a dumbbell with both hands.
Extend your arms overhead and bend at your waist to the right, keeping your arms straight. Use your core to pull your torso back to the center.
Do 1 minute to the right, then switch sides.
Pro tip: Don’t let your butt stick out — keep that ish tucked in.
7. Standing side crunch
How to do it: Stand with your feet slightly wider than hip-width apart. Grab a dumbbell in each hand and put your arms in a goalpost position. Engaging your core, perform a side crunch by bending at your waist and bringing your left leg toward your left elbow.
Do left side only for 1 minute, then right side only for 1 minute. Then alternate sides for 1 minute.
Pro tip: Your arms shouldn’t move much at all — make the majority of the movement come from the bending at your waist.
8. Standing crossover toe touch
How to do it: Stand with your feet wider than hip-width apart and extend your arms into a T. Engage your core, rotate your torso to the left, and tap your right hand to the outside of your left foot.
Do your left side only for 1 minute, then your right side only for 1 minute. Then alternate sides for 1 minute.
Pro tip: You can bend your knees slightly to do this one — but make sure the movement is still coming from your core rather than your legs.
9. Single-leg sprint
How to do it: Start in a low lunge position with your right knee bent, your left leg straight behind you, and your arms at your sides at a 90-degree angle. Hinge forward slightly at your hips, so your chest is over your right thigh.
Use your core to lift your left knee toward your chest and return it back to the floor behind you. Your arms will swing back and forth — kind of like you’re running.
Do 20 reps, then switch sides and repeat.
Pro tip: For better balance, make sure your moving leg is in sync with your opposite arm.
10. Chair pose with a twist
How to do it: Stand with your feet hip-width apart. Engaging your core, bend your knees and send your hips back into a chair pose. Put your hands in a prayer position.
Rotate your upper body to the right, aiming to get your left elbow passed your right knee.
Rotate to the other side to complete 1 rep. Do 20 reps.
Pro tip: Don’t allow your hips to twist to the right — instead, think about bringing your left rib cage to the right hip bone.
11. Standing twist
How to do it: Stand with your feet hip-width apart, knees slightly bent, a dumbbell in each hand, and arms in a goal post position. Rotate to the right, keeping your hips level and using your upper body to twist.
Rotate to the left. Broaden across your chest and level your shoulders throughout.
Rotate from side to side for 1 minute.
Pro tip: This requires a decent level of thoracic (aka upper spine) mobility. If this one’s hard for you, try increasing mobility with thoracic rotation exercises.
12. Overhead circle
How to do it: Stand with your feet slightly wider than hip-width apart and hold a dumbbell or medicine ball with both hands straight overhead. Use the weight to “draw” a large circle on the ceiling.
Do 30 seconds in one direction, then 30 seconds in the opposite direction.
Pro tip: Engage your core throughout and keep your hips level and straight. Keep your shoulders down too!
13. Standing toe touch
How to do it: Stand with your feet hip-width apart and your arms behind your head. Keeping your leg as straight as possible, lift your left leg up to around waist height and reach your right hand to touch your toes. (If you can lift your leg higher, go for it).
Alternate sides until you reach a count of 20 (10 on each side).
Pro tip: Keep your abs engaged and lift your leg in a controlled way (no kicking!).
14. Resistance band woodchop

How to do it: With your feet wider than hip-width apart, stand on both ends of a resistance band with your right foot. Grasp the center of the resistance band with both hands. Engage your abs and pull the resistance band up and across the body toward your left side. Return your hands back to your right side to just below hip level.
Keep your arms straight but the elbow soft (slightly bent).
Do a set of 10 and repeat on the opposite side.
Pro tip: You can make this exercise more difficult by using a shorter resistance band or stepping on the resistance band closer to where you place your hand.
15. Resistance band (or cable machine) Pallof press
How to do it: Set the resistance band anchor (or cable machine) at about elbow height. Take one step away from the anchor point while holding the resistance band at elbow height at the center of your body. (You shouldn’t be facing the anchor point, you should be turned 90 degrees to the right or left.)
With your feet and torso in line with one another, hold the resistance band with both hands and press straight out from your body. Slowly return your hands back to your chest.
Complete a total of 10 reps per side.
Pro tip: Don’t let your trunk turn toward the anchor point. Your head, shoulders, hips, and toes should face the same direction.
16. TRX hip drop
How to do it: Set your TRX handles to their full length and put the handles in single handle mode (thread one hand through the other, anchoring the threaded handle through the first handle.)
Stand far enough away that the straps are taut. Turn 90 degrees to your right so that you’re standing perpendicular to the anchor point.
Use both hands to hold the handle directly above your head — you can either rest your hands on the top of your head or hold them just above your head.
Without moving your arms, drop your right hip away from the anchor point, feeling a stretch along your right side. Use your abs to return to the standing position.
Complete 10 reps total per side.
Pro tip: To make this harder, increase the leaning angle of your body by moving your feet closer to the anchor point.
17. TRX standing elbow plank
How to do it: With the TRX straps adjusted about halfway up, put a stirrup (the foot strap) on each elbow with your elbows at a 90-degree angle. Lean forward into the straps as though you’re doing an elbow plank. Keep your elbows in line with your shoulders.
Hold for 30–60 seconds.
Pro tip: Make this move more difficult by slowly opening your arms until they are in a goal post position. Keep your elbows in line with your shoulders and at a 90-degree angle. Then, slowly close your arms and return to the starting position. Keep your spine straight and use your abs to stabilize your body without letting your hips dip.
18. Kettlebell around the world
How to do it: Stand with your feet hip-width apart. Hold a kettlebell in your right hand with your arm at your side. Engage your abs and keep your arm with the kettlebell straight with the elbow soft. Swing the kettlebell in front of your body and pass it to your left hand.
Without stopping the motion, swing the kettlebell behind your body and pass it to your right hand again.
Continue in this direction for 30–60 seconds and repeat in the opposite direction.
Pro tip: Keep your shoulders relaxed to avoid overworking your upper traps.
How we chose the best standing abs exercises
We leaned on two fitness experts to compile this list.
Our writer, Stacey L. Nash, is a NASM-certified personal trainer. We also interviewed Rachel Nicks, a barre instructor, to come up with the best standing abs exercises that target your entire core.
You can use standing ab exercises in a couple of ways:
- Add 2 or 3 standing ab exercises to a cardio or strength routine. Start with 2 sets of 10 and see how you feel. You can either increase reps or sets if you need more of a challenge.
- Create a HIIT workout with circuits of 5–7 exercises. Do each exercise for 45 seconds, going directly into the next exercise without a break until you get to the end of the circuit. Take a 2-minute break before starting the circuit again. Depending on your fitness level, you can do 2 or 3 circuits. If you’re sporting superior abs, do 4 or 5 circuits. If you’re looking for a more difficult workout, increase the length of time you do each exercise.
- Create a Tabata workout of 4 exercises. Similar to HIIT but different. In a Tabata routine, you’ll do 20 seconds of work at your highest intensity followed by 10 seconds of rest. Repeat this 8 times for a total time of 4 minutes. In 4 minutes, you’ll do each exercise twice.
The nice thing about abs: It’s hard to overdo them, so feel free to try 2 or 3 moves one day and 2 or 3 different moves the next time you work out.
Sooo, why do standing ab exercises over regular ol’ crunches?
Besides seeing them all over TikTok and wanting to give them a try, there are some legit benefits to staying vertical during your core workouts:
- More variety. Exercise can be boring. It’s just a fact of life. If you’re bored of doing your same old plank and crunch variations, standing ab exercises can be a fun way to mix things up.
- Avoid lying on the floor. If you’re at a new gym or working out in a hotel room, lying on a questionably clean floor can feel… gross. Standing abs exercises help you avoid that.
- Work different muscles. Standing abs give you a chance to work your abs on the transverse (twisting) plane in motions that closely mimic how you use your abs in the real world. A strong transverse plane is also important for running efficiency and shoulder strength.
- Better for certain conditions. These types of ab exercises are also a good option for people with blood pressure concerns, circulatory issues, or mobility issues that make it hard to get on and off the floor. Getting on and off the floor can cause changes in blood pressure — and if you’ve got joint issues, you don’t need to worry whether or not you’ll be able to get off the floor when you’re done.
If you have any type of injury that’s aggravated by standing ab exercises, skip them until you’re healed. A low back, hip flexor, neck, or shoulder injury — depending on the nature of the injury and the exercise you want to do — could be aggravated by standing ab exercises.
Overall, standing abs are a great way to change up your ab routine and challenge your body. They can also give you a break from standard (ahem, boring AF) crunches and planks. Use this list of exercises to build your perf standing core routine.