
We include products we think are useful for our readers. If you buy through links on this page, we may earn a small commission. Here’s our process.
Greatist only shows you brands and products that we stand behind.
Our team thoroughly researches and evaluates the recommendations we make on our site. To establish that the product manufacturers addressed safety and efficacy standards, we:- Evaluate ingredients and composition: Do they have the potential to cause harm?
- Fact-check all health claims: Do they align with the current body of scientific evidence?
- Assess the brand: Does it operate with integrity and adhere to industry best practices?
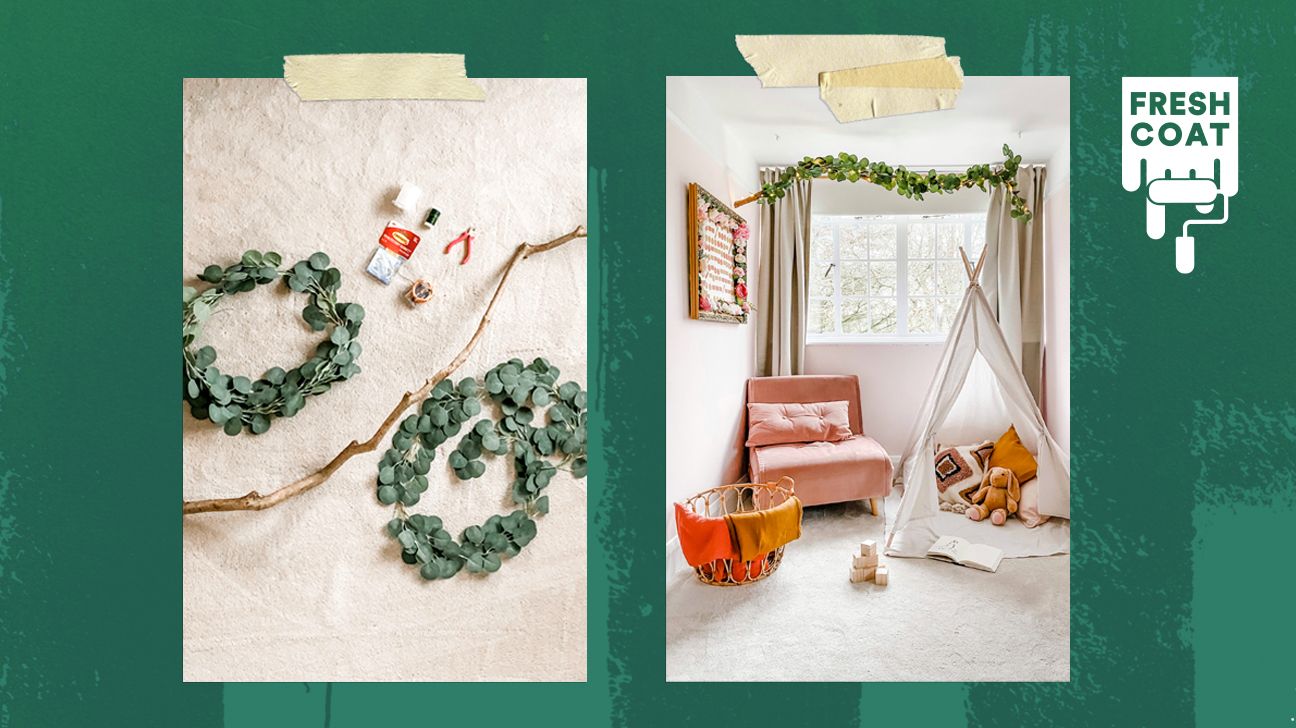
FreshCoat is an ongoing series at Greatist that features easy, affordable DIY home projects, so you can add joy to your life by sprucing up your space.
For me, winters are long. I try to get outside during the daylight hours as much as possible to improve my mood and well-being. But it can be a challenge to leave the warmth of my house when it’s cold and miserable outside.
But recently, I discovered I can bring some of the nature I miss so much indoors by adding natural decorative pieces to my home. And one of my favorites is this DIY hanging branch with twinkle lights.
This project adds the perfect seasonal touch to my house. I love it because I get to enjoy a little of what the weather’s doing outside while still staying cozy.
It’s also super adaptable and easy to change to suit the season. When I want to change it up, I simply take it down and add a few dried flowers, decorative beads, hanging ornaments, etc. Enjoy the tutorial I put together below!
*Click on the links below to be directed to Amazon
- 1 branch
- 2 faux eucalyptus garlands
- 1 LED string light
- Florist wire
- Wire cutters
- Adhesive hooks
- Florist tape
- String/twine (to hang your branch)
- Pencil
- Tape measure
Step 1: Get your branch
The branch needs to be light enough to hang. If you’re hanging it with adhesive hooks like I did, calculate the total weight the hooks can hold. And keep in mind that you’re also going to add lights and other decorations. (I chose a branch that was about 1 inch thick and 5 feet long.)
If you live in an urban area, you can probably find a suitable branch in your local park. Or you could ask friends on social media if they have any fallen branches lying around. You could also potentially use driftwood from a beach or riverbank.
Closely inspect the branch you choose for signs of fungus you wouldn’t want to take into your home.
Step 2: Prepare your branch
Give your branch a quick clean with a cloth. Then place it somewhere warm to dry out — this should take about a week.
Total time: ~30 mins + 1 hour wait for adhesive hooks before hanging.
1. Lay out your eucalyptus and the branch and decide on placement. I found that using one of the garlands on the base and one on the top provided a fuller look, but it’s up to you. Keep in mind how the branch will look once it’s hung and what you’ll be able to see.
2. Use the wire cutters to cut about 5 pieces of florist wire that are a few inches long.
3. Pinch the branch and garland together with one hand and wrap the piece of florist wire around them with your other hand. Be careful to conceal the wire behind the leaves.
4. Repeat all along the branch until the garland is well-secured and not drooping off the branch.
5. Attach the battery pack of the string lights to the end of the branch using a couple of pieces of florist tape. You want to attach it where it will be concealed from view but where you can still reach it to turn the lights on and off.
6. Wrap the lights around the branch, making sure to evenly space the lights. I found this part easier to do with the lights on so I could see how it would look.
7. Weigh the finished decorated branch to ensure you use the correct number of hooks. I did this by standing on my bathroom scale with and without the branch to work out its weight. My branch weighed 2.2 pounds. The adhesive hooks I bought to hang it could hold 2 pounds each, but I chose to use three of them to be on the safer side.
8. Measure your ceiling and lightly mark with a pencil where you’ll place your hooks so that they’re even and level with each other.
9. Follow the instructions that come with the hooks to attach them to your ceiling.
10. Add string to your branch and hang from the adhesive hooks. Turn on your lights and enjoy!
I hope you enjoyed reading this tutorial and would love to see your creations — please be sure to tag me on Instagram @atoakhill.