
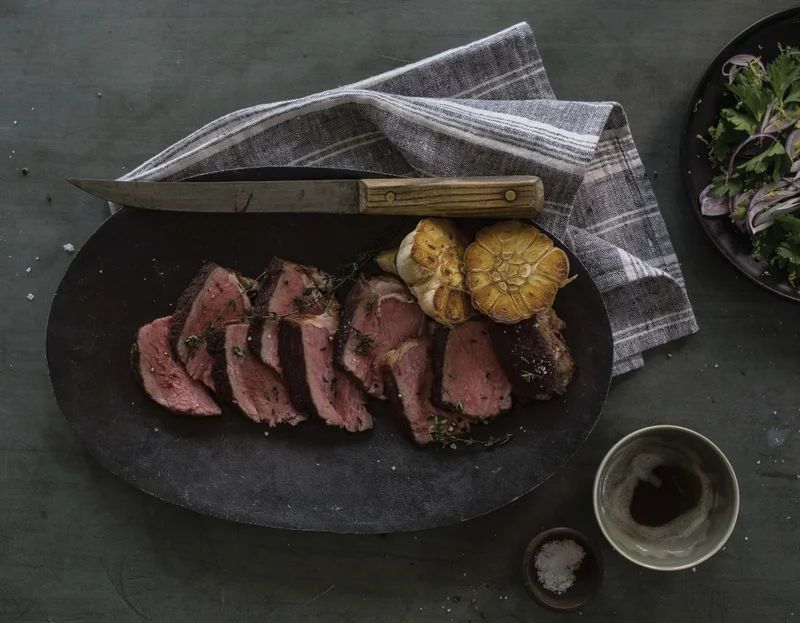
Lisa Q. Fetterman shares her recipe for the perfect sous vide steak:
I consider steak the gold standard of sous vide cooking because it ensures reliable, exact cooking for a cut of meat where doneness counts for everything. This amount of control not only means that I can make my perfect steak every time, but that you can customize your perfect steak every time, too. I consider 55°C (131°F) the ideal temperature for medium rare when cooking rib eye and other tender steak cuts (for example, strip, top sirloin, tenderloin, and porterhouse). That said, experiment with temperature and let your own taste be your guide. You’ll find that even a few degrees up or down can make a dramatic difference. If you or your guests prefer your meat more done, try cooking it at 60°F (140°F) for medium and 65°C (149°F) for medium well. The results will still be far juicier than conventionally cooked steaks.
- Yield: Serves 4
- Total: 1 hour
- Active: 10 minutes
Ingredients (6)
- 2 (1-inch-thick) boneless rib-eye steaks (about 1 pound each), preferably with fat cap intact
- Salt and freshly ground black pepper
- 1 tablespoon canola or other mild vegetable oil
- 2 tablespoons unsalted butter
- 4 to 6 thyme sprigs
- 1 clove garlic, lightly crushed
Instructions
Do-ahead strategy: If you intend to chill and reheat the steak, I recommend salting the meat after it comes out of the bag (see page 117 for an explanation). The cooked steak can be chilled in the bag in an ice water bath (see page 14) for 20 minutes and then refrigerated for up to 1 week. Reheat in a 55°C (131°F) water bath for 20 minutes and then proceed to the searing step. You can also reheat the fridge-temperature steak directly in the sauté pan or skillet by adding an additional 5 minutes while basting and turning the meat.
- Preheat your sous vide water bath to 55ºC (131ºF).
- Season the steaks with salt and pepper and then place in a gallon-size freezer-safe ziplock bag and seal using the water displacement method (see page 12).
- When the water reaches the target temperature, lower the bagged steaks into the water bath (making sure the bag is fully submerged) and cook for 1 hour.
- When the steaks are ready, remove the bag from the water bath and let them rest for 10 minutes. Transfer the steaks from the bag to a platter or tray and pat the meat thoroughly dry with paper towels.
- Heat a large, heavy sauté pan or cast-iron skillet over medium-high heat. Once the pan is hot, add the oil and swirl to coat the bottom. Let the oil heat until it shimmers and sends off wisps of smoke, 30 to 60 seconds. Place the meat in the pan and sear until the underside is browned, 30 to 60 seconds. Using tongs, flip the steaks over and brown the second side, 30 to 60 seconds longer. If the steaks have their fat caps, use tongs to hold both steaks upright on their sides, fat pressed against the pan, and render until the fat is crisp and browned, 1 to 2 minutes.
- When the steaks are browned on both sides, or after the fat caps are crisped, add the butter, thyme, and garlic (in that order) off to the side of the pan. The butter will sizzle and brown immediately and the thyme will crackle and pop.
- Once the butter has turned completely brown and has stopped sizzling (meaning all of the water has cooked out), baste the meat: tilt the pan to accumulate the fat on one side, then, using a metal spoon, scoop up the brown butter and distribute it evenly over the meat. As you baste, be sure to flip the meat to brown both sides again as above until the entire surface is a deep, almost mahogany brown, about 30 seconds per side. Depending on the strength of the burner, you may need to flip the meat more than once; just make sure it doesn’t rest on any one side longer than 1 minute or it will begin to overcook.
- Transfer the meat to a platter or tray and wait for at least 2 minutes before slicing to allow the juices to redistribute after the high-heat searing. Enjoy your steak perfection.
Pro-tip: The technique of basting the steak with butter while in the pan is an excellent method any time you want to achieve a beautifully uniform sear on the stove top.