We include products we think are useful for our readers. If you buy through links on this page, we may earn a small commission. Here’s our process.
Greatist only shows you brands and products that we stand behind.
Our team thoroughly researches and evaluates the recommendations we make on our site. To establish that the product manufacturers addressed safety and efficacy standards, we:- Evaluate ingredients and composition: Do they have the potential to cause harm?
- Fact-check all health claims: Do they align with the current body of scientific evidence?
- Assess the brand: Does it operate with integrity and adhere to industry best practices?
Getting rid of grit is paramount when making clams, and all you need are a few bowls, cold water, a scrub brush, and a little patience. Learn how to clean your clams, plus how to choose clams, shuck clams, and what to cook with fresh clams too.
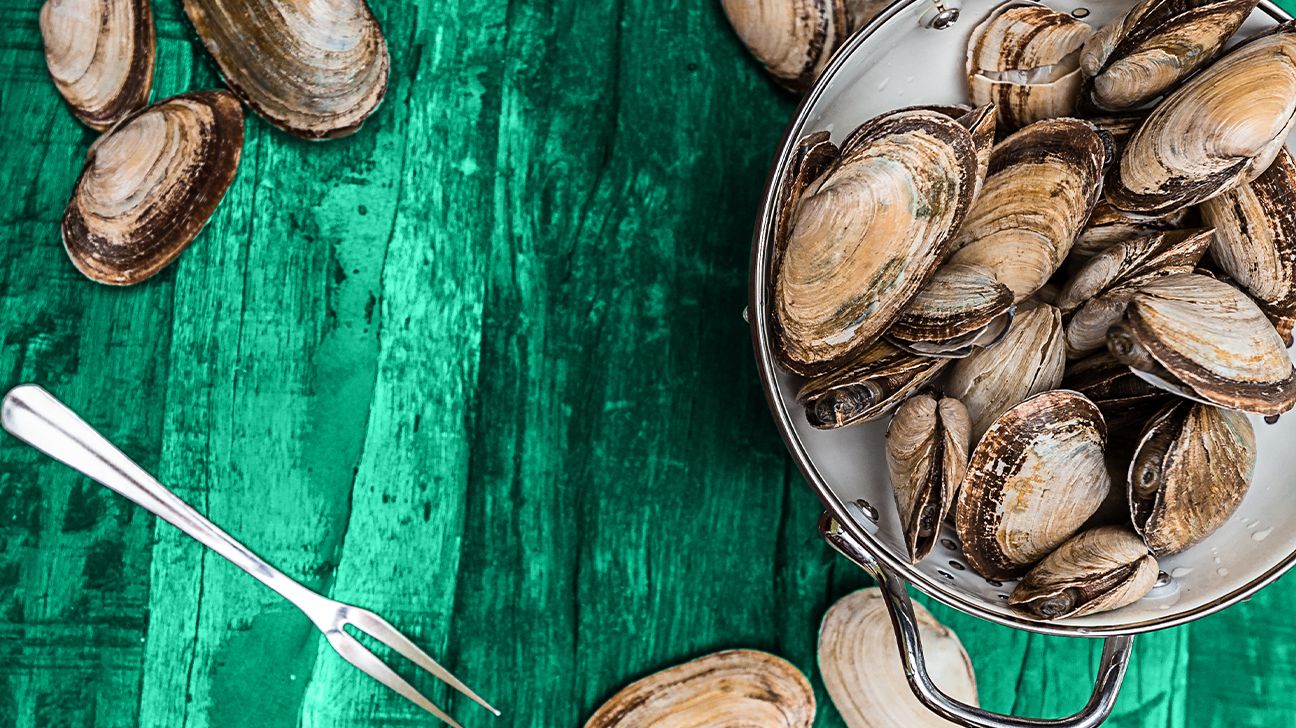
If you’re not already a fan of clams, there are several hurdles to overcome on the path to appreciation. They have a reputation for being rubbery and sometimes gritty, they can seem daunting to prepare, and much like crabs, they even suffer from negative word association (“clammy” is never used as a positive descriptor for anything). But then there’s also the phrase “happy as a clam”—and we’re happy to dispel those other misgivings: clams are not overly chewy when they’re properly cooked, are never gritty when properly cleaned, and they’re not difficult to work with once you know how.
Joanne Chang and Karen Akunowicz of Myers + Chang in Boston gave us some pointers, and we collected a few more tips to set up you for success when cooking fresh clams.
When buying live bivalves, regardless of what type of clams you’re after, look for ones that are tightly closed, without any obvious cracks or chips in their shells. (One caveat: soft shell clams will not be completely closed.) They should smell fresh and clean—reject any hint of fishiness or ammonia, sure signs of spoilage. If you have a significant distance to go between the market and home again, pack them next to something cold, and make sure they’re not tightly closed in a plastic bag or they may suffocate.
Ideally, don’t. They’re best cooked as soon as possible after purchasing, but you can hold them in the fridge for up to 2 days if need be. Place them in a bowl or other open container. Some sources recommend covering the bowl with a damp cloth or cheesecloth, while others say there’s no need, but one thing’s for sure: storing live clams in a closed container or submerged in water will kill them, which you don’t want to do (yet).
First, check for any bad apples—er, clams. Tap the top shell of any open clams, and if any of them don’t close themselves back up, discard them, as they’re dead. As mentioned above, soft shell clams won’t close completely, but when you give the shell a tap, the neck of the clam should retract to some degree. If there’s no movement, toss it.
Once you’ve gotten rid of any dead clams, which easily and rapidly breed bacteria, you’ll need to clean the live ones, both outside and in. To do this, all you need are three bowls (each big enough to hold all your clams), cold water, and a scrub brush.
1. Fill the first bowl with cold water—never warm or hot, since that will kill the clams—and submerge all the live bivalves. Some people add cornmeal to the water to help purge the clams, but all that should be necessary is salt (if even that). You can add enough salt to make the water mimic ocean salinity, then put the bowl back in the fridge and let the clams soak for 20 minutes.
2. Set up a second bowl full of cold, salted water. Lift the clams out of the first bowl and place them into the second soaking vessel. You don’t want to dump them from one bowl into another, even if you use a strainer, because you’ll just be pouring the gritty water back over the clams, negating step #1.
3. Let them soak in the second bowl of clean, cold, salty water in the fridge for another 20 minutes.
4. When the second soak is done, set up a third bowl full of cold, salted water, and again, lift the clams from their current bowl and transfer them to the new one. Soak them in the fridge for a final 20 minutes. That third time should be the charm. However, if you still see a lot of sand in the bottom of the bowl, you may want to repeat the process, once or even twice.
5. Finally, scrub each clam with a stiff-bristle brush to remove any grit or debris on the shells. Then they’re ready to go.
If you’re steaming them or having a clambake, you don’t need to remove the clams from their shells, but for things like clam chowder and pasta, you may want to shuck them first. Do this over a bowl so you catch all the briny-sweet juices (aka liquor), which you can add to your recipe right along with the clam meat. Chilled clams are easier to shuck, so make sure they’re still cold at this point. While it helps to have a proper shucking knife, you can use any small, sharp paring knife you have—with caution, of course.
Use a kitchen towel to hold a cleaned clam in your non-dominant hand (you can even wear a thick, protective glove if you like), and hold the clam with the opening by your fingertips. Use your other hand to wield the knife; carefully slide the sharp edge between the lips of the shells and work the blade around the entire seal between the shells to break it. You should then be able to pry the top shell up.
Scrape the tip of your knife along the inside of the top shell where the clam is attached to it, then do the same on the bottom to cut the lower adductor muscle. If you’re serving clams raw, tear off the top shell completely at this point; otherwise, just tip the meat and liquor into a bowl, picking out any bits of shell that may have chipped off during opening.
If you find the prospect of shucking clams too tedious or too potentially dangerous, you can always steam them first, then pick out the meat and mix it into your finished dish before serving—just be careful of overcooking the clams or they may turn rubbery. And always throw away any clams that are still closed after being cooked, no matter what method you use, or they could make you sick.
And that’s all there is to it! So if you’ve been hesitant about cooking fresh clams, it’s about time to come out of your shell. Here are some recipes to help you get started:
New England Clam Chowder
The classic creamy comfort food from the sea, rich New England clam chowder can be great with canned bivalves, except when they’re chewier than pencil erasers. Try making a batch with fresh clams and you may never go back again. Get our New England Clam Chowder recipe.
New England Style Fried Clams
The other favorite New England way to cook clams is to dip them in evaporated milk, bread them in fish fry mix or corn flour, and fry them, for a great contrast of crunch outside and briny lusciousness within. Traditionally, whole belly clams are favored, but some find them too rich and too strong-tasting. You can use the same method for whatever clams you prefer (or can find) and they’ll taste delicious. Get the New England Style Fried Clams recipe.
Steamed Clams
Butter, garlic, lemon, and white wine are classic flavors to pair with lots of different seafood, and steamed clams are no exception. A touch of cream makes the sauce extra luxurious, perfect for soaking up with crusty grilled bread, and it all comes together in a snap. Get the Steamed Clams recipe.
Linguine with Clams
American versions of linguine with clams often includes a heavy sauce, sometimes white, sometimes red, but Italian versions often exercise a lighter hand. We err on the side of simplicity, but add our own twist by smoking littleneck clams and cherry tomatoes on the stovetop. If that’s not an option, just steam the clams and lightly saute the tomatoes in a little oil until they collapse and release their juices to form a light sauce. Get our Linguine with Clams recipe.
Coconut Green Curry Steamed Clams
This is a fantastic option when you’re craving clams but also something a little different. Green curry paste, garlic, ginger, lime juice, and coconut milk give them a great Thai flavor. Get the Coconut Green Curry Steamed Clams recipe.
Chorizo Stuffed Baked Clams
Clams casino with bacon and breadcrumbs may be the most common form of baked clams, but this take uses spicy chorizo and almond meal for a delicious twist that’s also gluten-free. Get the Chorizo Stuffed Baked Clams recipe. (Rhode Island stuffies are similarly delicious.)
Manhattan Clam Chowder
It’s a classic food battle along the same lines as ketchup vs mustard or chocolate vs vanilla: creamy New England clam chowder or brothy red Manhattan clam chowder (which is really closer to cioppino)? Both are delicious in their own way, but only you can decide which wins your heart (and stomach). Get the Manhattan Clam Chowder recipe.
White Clam Sauce Pizza with Chile Oil
For those unfamiliar with New Haven-style pies, clams on pizza may sound odd, but it’s worth trying at least once. The white clam pie invented by Frank Pepe in the 1960s featured garlic, olive oil, oregano, and mozzarella, but this version is a bit richer, with heavy cream and two types of cheese, plus sauteed onion and white wine. And then there’s spicy chile oil on the side! Get the White Clam Sauce Pizza with Chile Oil recipe.