
Whether you slept in a funky position or you’re slowly morphing into the shape of your WFH office chair, back pain is no joke. The first step to curing the ache is pinpointing the problem. Stiff muscles, maybe? Or it could be an irritated sciatic nerve.
Your sciatic nerve starts in your lower back and then splits to both sides of your body, running through your butt cheeks and down the backs of your thighs, all the way to your knees.
“Sciatica” is just a fancy term for sciatic nerve pain. It happens when your sciatic nerve gets:
- pinched
- compressed
- irritated
- damaged
Some folks experience sciatica along with other back or muscle injuries. But it can also be triggered by sitting, walking, or standing with bad posture. Ah, #WFHLife.
Sciatica can range from mildly annoying to “OMG, my leg is on fire!” You might feel sharp, shooting pains down your leg. Or it might come on as a burning or tingling feeling.
Because the sciatic nerve has two distinct sections, folks usually get sciatica on only one side of their bodies at a time.
Certain yoga poses can soothe sciatica. For instance, one 2013 study of 60 people with sciatica found that Cobra Pose and Locust Pose relieved pain, tenderness, and stiffness.
A 2017 research review indicated that yoga isn’t effective enough to be a blanket recommendation for sciatica — but another 2017 study concluded that yoga can:
- soothe frequent lower backaches
- reduce on the need for meds for back pain
- help you feel more loose and limber
Ready to test the poses for yourself? Put on some comfy clothes, grab a towel or mat, and let’s dive into a gentle flow.
1. Child’s Pose (Balasana)
Child’s Pose is an easy, breezy way to stretch your spine and relieve tension. It also stretches out your hips, thighs, and lower back. If you’re super tight, grab a cushion or rolled-up towel to put under your chest, forehead, or thighs — wherever you need the most support.
- Start in tabletop position, with knees and hands on the floor.
- Shift your hips alllll the way back onto your heels while bringing knees closer together.
- Either stretch arms out in front of you or keep them close to your body with fingertips pointing toward feet.
- Relax… breathe in, breathe out.
- Try to deepen your breathing as you totally relax into this pose (and the floor) for up to 5 minutes.
2. Downward-Facing Dog
You know how puppies love to stretch with their head on the ground and butt in the air? Yeah, that’s Downward-Facing Dog.
This pose is tougher than it looks, but it helps straighten your spine, relieving pain and tension in your lower back. It’s also great at strengthening your arms.
- Start the same way you did for Child’s Pose — hands and knees on the floor.
- Now press all your weight into your hands while you raise your booty toward the ceiling. (Feel that stretch!)
- With your butt still high, let your head drop so it’s centered on your ears. For a nice neck stretch, tuck chin in toward chest.
- Get comfy in this pose by bending your knees just a bit (it keeps your pelvis tilted just right). As you work out the kinks in your back and legs, rock back and forth on your feet and hands or just move slow and steady into what feels good.
- Stay here for a full minute before gently lowering yourself back down.
3. Half Moon Pose (Ardha Chandrasana)
Are you ready for some balancing action? Half Moon Pose is known for its stabilizing and strengthening powers. When done properly, it’ll melt tension while stretching your glutes, thighs, and spine.
Unless you’re a regular at yoga class, do this pose up against a wall. You want to sink into the stretch without worrying about falling over. You can also stabilize yourself with a block under your hand.
- Start off like you’re about to do a side lunge, with right foot out in front.
- Bend right knee and shift your weight onto right foot.
- Put left hand on your hip.
- Bend at your waist while reaching right hand down to the floor on the outside edge of right foot.
- Keep left leg straight as you lift it until it’s parallel to the floor. Imagine something is pulling on your left heel.
- Steadily — and without losing your balance! — open up your hips toward the left side while keeping head in line with neck.
- If you’re comfortable there, you can deepen your stretch by pointing your left hand toward the ceiling and turning your neck to look at the sky.
- Stay here for 1 full minute.
- To switch sides, slowly bend right leg and lower your left leg. Then repeat on left leg.
4. Cobra Pose (Bhujangasana)
Cobra Pose gives your spine a nice gentle stretch. It also boosts circulation.
- Lie on your stomach, bend your arms, and put hands directly under shoulders.
- Tightly squeeze your elbows close to your torso.
- Breathe in while you lift your head, then chest, then shoulders. Keep your hands anchored in place!
- Straighten arms slightly, still keeping hips on the floor.
- In the lifted position, flex thighs, abs, and lower back. Find what feels good, as Adriene says!
- Hold for 30 seconds if you can.
- Sink back down onto the floor, take a few deep breaths, and repeat.
5. Locust Pose (Salabhasana)
Let’s get your blood pumping! Locust Pose builds core strength while working your glutes and thighs. If you do it on the reg, it can boost your hip flexibility.
- Lie facedown with your arms by your sides.
- Sloooooowly raise head, chest, and arms as high as your spine allows, keeping arms straight and pointed toward feet.
- If it’s comfortable, lift one or both legs.
- Make sure abs, butt, and lower back are flexed to support the pose and keep stress off your neck.
- Stay here for up to 30 seconds.
- Slowly lower your body back to the floor while you take deep breaths.
- Stretch your hips from side to side, then repeat.
6. Wind Pose (Pawanmuktasana)
Beware: This one’s aptly named! Wind pose releases sciatica and gassy bloat. It’ll also loosen up your back, hips, and glutes.
If Wind Pose ever gets painful for your back or belly, switch to doing just one leg at a time.
- Lie on your back with knees pulled toward chest.
- Keep ankles and knees pressed together while you wrap your hands around to grab the fronts of shins or backs of thighs.
- If it’s comfortable, grab opposite elbows with your hands or fold hands together in the middle.
- That’s it! If you want to deepen the stretch, roll your head forward so chin touches chest.
- Hold for up to 1 minute at a time.
7. Reclined Pigeon Pose (Supta Kapotasana)
Full-on Pigeon Pose might be a lil’ rough when you’re on the sciatica struggle bus. Get all the stretchy goodness with none of the pressure by trying Reclined Pigeon Pose.
What makes this one so magical is the way it relaxes the piriformis, a little muscle deep in your glutes.
- Lie on your back with knees bent.
- Put right ankle on top of left thigh — just above the knee is fine.
- Feel that stretch? You can hold the pose here for a while if you want.
- For a deeper stretch, slowly lift left foot so left knee is pulled toward your chest.
- When left leg is close enough, grab left thigh or shin to pull it in closer.
- Hold this stretch for up to a minute, then repeat on the other side.
8. Bridge Pose (Setu Bandha Sarvangasana)
When done right, Bridge Pose stretches the tension out of your spine, boosts circulation, and gets your legs and glutes burning — in the best way possible.
Remember that this pose involves slow, controlled stretching. Avoid hyperextending your back.
- Lie on your back with feet flat on the floor, pulled in toward your butt.
- Let arms rest at your sides, palms down.
- Slooooowly peel spine up off the floor, raising hips toward the sky.
- To keep your body aligned, hold a block or rolled-up towel tightly between knees or thighs.
- Slowly lower yourself back to the floor.
- Do this slow, controlled hip lift 10 times, loosening your spine.
- Raise back up and hold for up to 1 minute.
9. Half Lord of the Fishes Pose (Ardha Matsyendrasana)
Think of this as the ultimate back-cracking move. Twisting will lengthen your spine and melt away tension all up and down your back.
- Sit on the floor with legs out in front of you, then bend your right leg.
- Anchor right foot on the outside edge of your left hip or thigh, doing your best to keep right knee pointed up.
- Slide left foot to the outside edge of right thigh.
- Put right hand on the floor and use your fingers to support your body.
- If you can, wrap left arm around right thigh..
- Breathe in slowly, sitting up as straight as possible.
- Breathe out, twisting just a bit more.
- Keep breathing, lengthening your spine on the inhale and twisting on the exhale.
- Turn your head from side to side to keep your neck loose.
- Hold the twist for up to a minute, then repeat on the other side.
10. Legs-Up-the-Wall Pose (Viparita Karani)
Ahh, sweet relief. Viparita Karani is super easy and super relaxing. You’ll wonder why it’s not part of your nightly routine.
PSA: If you feel like you can’t fully melt into the position, add a cushion under your hips for support.
- Sit on the floor with one side of your body against a wall.
- Lower onto your back as you swing your legs up along the wall.
- Scooch hips as close to the wall as possible.
- Cushion your head with a folded towel or blanket, a small pillow, or a wadded-up sweatshirt — anything soft will do!
- Let arms rest wherever they’re most comfortable
- Imagine your body sinking lower into the floor as you relax every muscle.
- Chill in this position for up to 20 minutes.
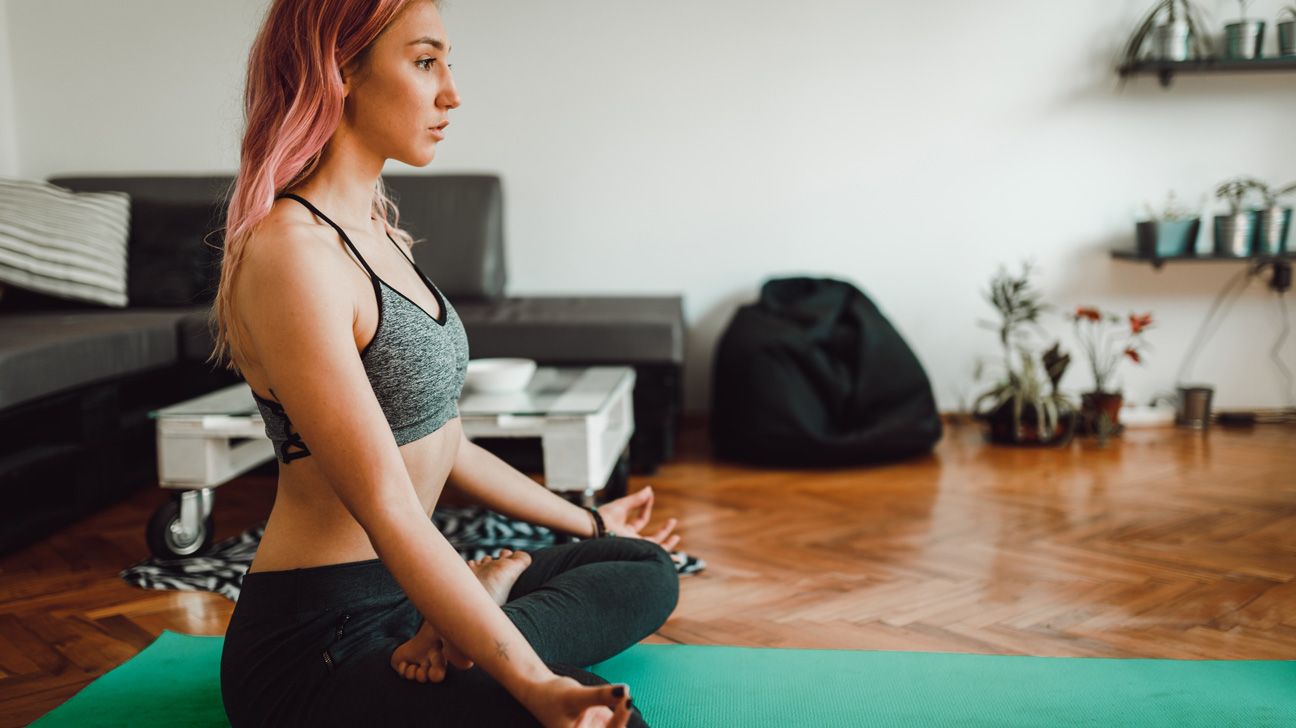
11. Bound Angle Pose (Baddha Konasana)
This one’s also known as Butterfly Pose, and it’ll probably take you back to your kindergarten days when you tried out every imaginable variety of sitting “crisscross style.” No leg-crossing here, thankfully. Bound Angle Pose gently stretches your thighs and groin.
If Bound Angle Pose hits your sciatic nerve in a bad way, stop immediately. Instead, try this pose in a reclined position, starting on your back.
- Sit on the floor and focus on keeping your spine straight and tall.
- Bring the bottoms of your feet together.
- Keeping feet together and on the floor, slowly shift them in toward your groin.
- If the stretch feels comfortable, lean into it by tilting torso forward.
- Alternatively, if the stretch is painful, release the pose and do the same thing while lying on your back.
- Hold the pose while you take 5–10 slow breaths.
Yep, and we’ve got your back with a handy list:
- no forward bends (other than Down Dog, of course)
- no poses that worsen shooting pains, pins and needles, or other sciatica symptoms
- no super twisty poses that put pressure on your back or belly
Basically, if you listen to your body, it’ll tell you when you’re pushing it too far. Yoga should never cause excruciating pain or make you feel like you’re stretching beyond your limits.
Take sciatica day by day. Try the poses above but also experiment with gentle stretches. Sometimes it helps to put cushions under your knees or stretch one side more than the other.
Some peeps get sciatica when they’re pregnant. If that’s you, remember to avoid any positions that put pressure on your belly. Supporting yourself with cushions, bolster pillows, or rolled-up towels might help you feel more comfortable too.
Sciatica got your goat? Yoga might help.
No matter which poses you try, go slow and steady. Be gentle with your aching back — you can’t force a sciatic nerve into submission.
If you’ve never done yoga, now is a great time to try a class, whether in person or for free online. At the very least, check in with a yoga pro once a month or so to make sure you’re doing the poses properly. #SafetyFirst
If your sciatica doesn’t quit after a month — or if it’s hella painful — call your doctor. You might need medical treatment from a doctor or a physical therapist.