We include products we think are useful for our readers. If you buy through links on this page, we may earn a small commission. Here’s our process.
Greatist only shows you brands and products that we stand behind.
Our team thoroughly researches and evaluates the recommendations we make on our site. To establish that the product manufacturers addressed safety and efficacy standards, we:- Evaluate ingredients and composition: Do they have the potential to cause harm?
- Fact-check all health claims: Do they align with the current body of scientific evidence?
- Assess the brand: Does it operate with integrity and adhere to industry best practices?
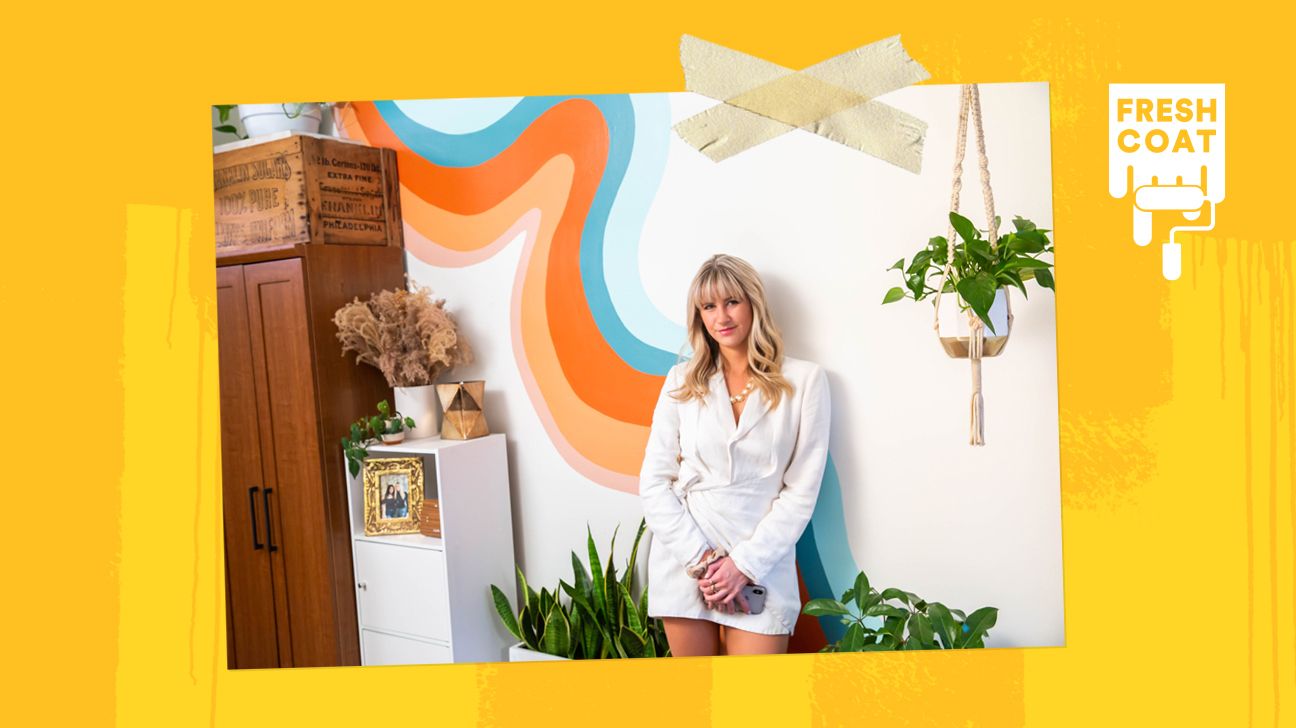
FreshCoat is an ongoing series at Greatist that features easy, affordable DIY home projects, so you can add joy to your life by sprucing up your space.
To say this past year was a test of our strength would be an understatement. Some faced more extreme difficulties than others, but what we all have in common is a mutual drive to survive, all the while being confined to our homes more than ever before.
For some, that meant working on a sourdough starter. For others, it meant watching “Tiger King.” For me, it meant painting a mural on my bedroom wall.
At first, I was nervous to make the leap. I’m always pretty critical of my own work, and this project felt like a big commitment, since it can’t easily be removed. But once I finished, I was so relieved! I didn’t hate it or want to redo it. It’s completely transformed my tiny NYC apartment into an inspiring, happy place I want to spend time. And each morning I wake up to see the mural bathed in sunlight, I feel happy and grateful.
Beyond the daily reward, it opened new opportunities including inspiring me to start my own interior design business, Nestia. But you don’t have to know a thing about interior design (or have deep pockets) to achieve a mural like mine. Here’s a step-by-step run down of how I made it a reality.
Pro tip: Sample paint sizes (7.75 fluid ounces) of each paint color go a long way!
Paint colors
*The links below are shopping links
Tools and accessories
Total cost: ~$100
Step 1. Look for inspiration for your design
Before committing to this mural, I did a lot of inspiration searching, mostly focusing on Pinterest searches like “colorful home mural.” I found I was most drawn to free-flowing abstract lines. I was particularly inspired by multiple murals painted by Evie Kemp.
Her work is fun and full of color, but also felt like a project I could achieve quickly and on a tight budget.
Step 2. Choose your color scheme
I wanted to create a vibe in my bedroom that felt bold and colorful, while not stepping too far outside the color scheme my room was already working within.
When it came to choosing my color scheme, again I turned to Pinterest for inspiration. I knew I wanted to include the deep orange that already existed in some of my bedroom accessories (i.e. throw pillows, planter, and carpet).
When I came across this photo, I knew I’d found the right color palette. It included my staple orange and pops of turquoise, which I also have in my carpet’s pattern.
Get a second, or third, pair of eyes
When I was still debating on my design, I mocked up 2 options using Adobe Illustrator and took a poll on Instagram to get feedback from friends. When the resounding answer was the wavy wall mural, I knew I had to take the chance!
Step 3. Draw out your design
I drew out the pattern using pencil directly on the wall, but if you’re not confident in that option, sketch it out on paper first. This will help you visualize how large to make the design (make sure to compare it to other items in your room).
Pro tips
- Keep it simple. Making your design complex will be time consuming and might become frustrating, which can hinder your confidence in completing the project.
- Go bold. Remember, this is a statement design — it’s meant to pop.
Step 4. Protect surfaces
Add painters tape to any ceiling line or bottom molding and lay out a tarp or sheet on the floor in case of paint splatters. Move any furniture that’s close to your work area.
Step 5. Start painting
Follow your pencil guides as accurately as possible. If your design is wavy like mine, don’t fret if you paint outside the lines. It’s meant to be abstract and you can be fluid with your shapes!
Complete each section of color, not worrying about the imperfections just yet.
Let dry for around 2 hours and then paint a second coat.
Step 6. Touch up the lines
Once the second coat is dry, it’s time to go in and clean your edges with a smaller brush. Try to smooth out any lines that got a little bumpy.
Step 7. Remove tape and tarp
Remove your painters tape and tarp, move your furniture back in place, and you’re finished!
Maggie Antalek is an interior decor consultant and artist based in New York City. Her newest creative endeavor is her affordable interior consulting business, Nestia, which strives to bridge the gap between high end interior design and low budget DIY, making home design accessible to everyone. Follow her on Instagram (@nestiahome) or visit her website for more info at www.nestiahome.com.